Creating a Volume in Hyperstack
This streamlined guide will help you create a new storage volume in Hyperstack, covering all necessary steps.
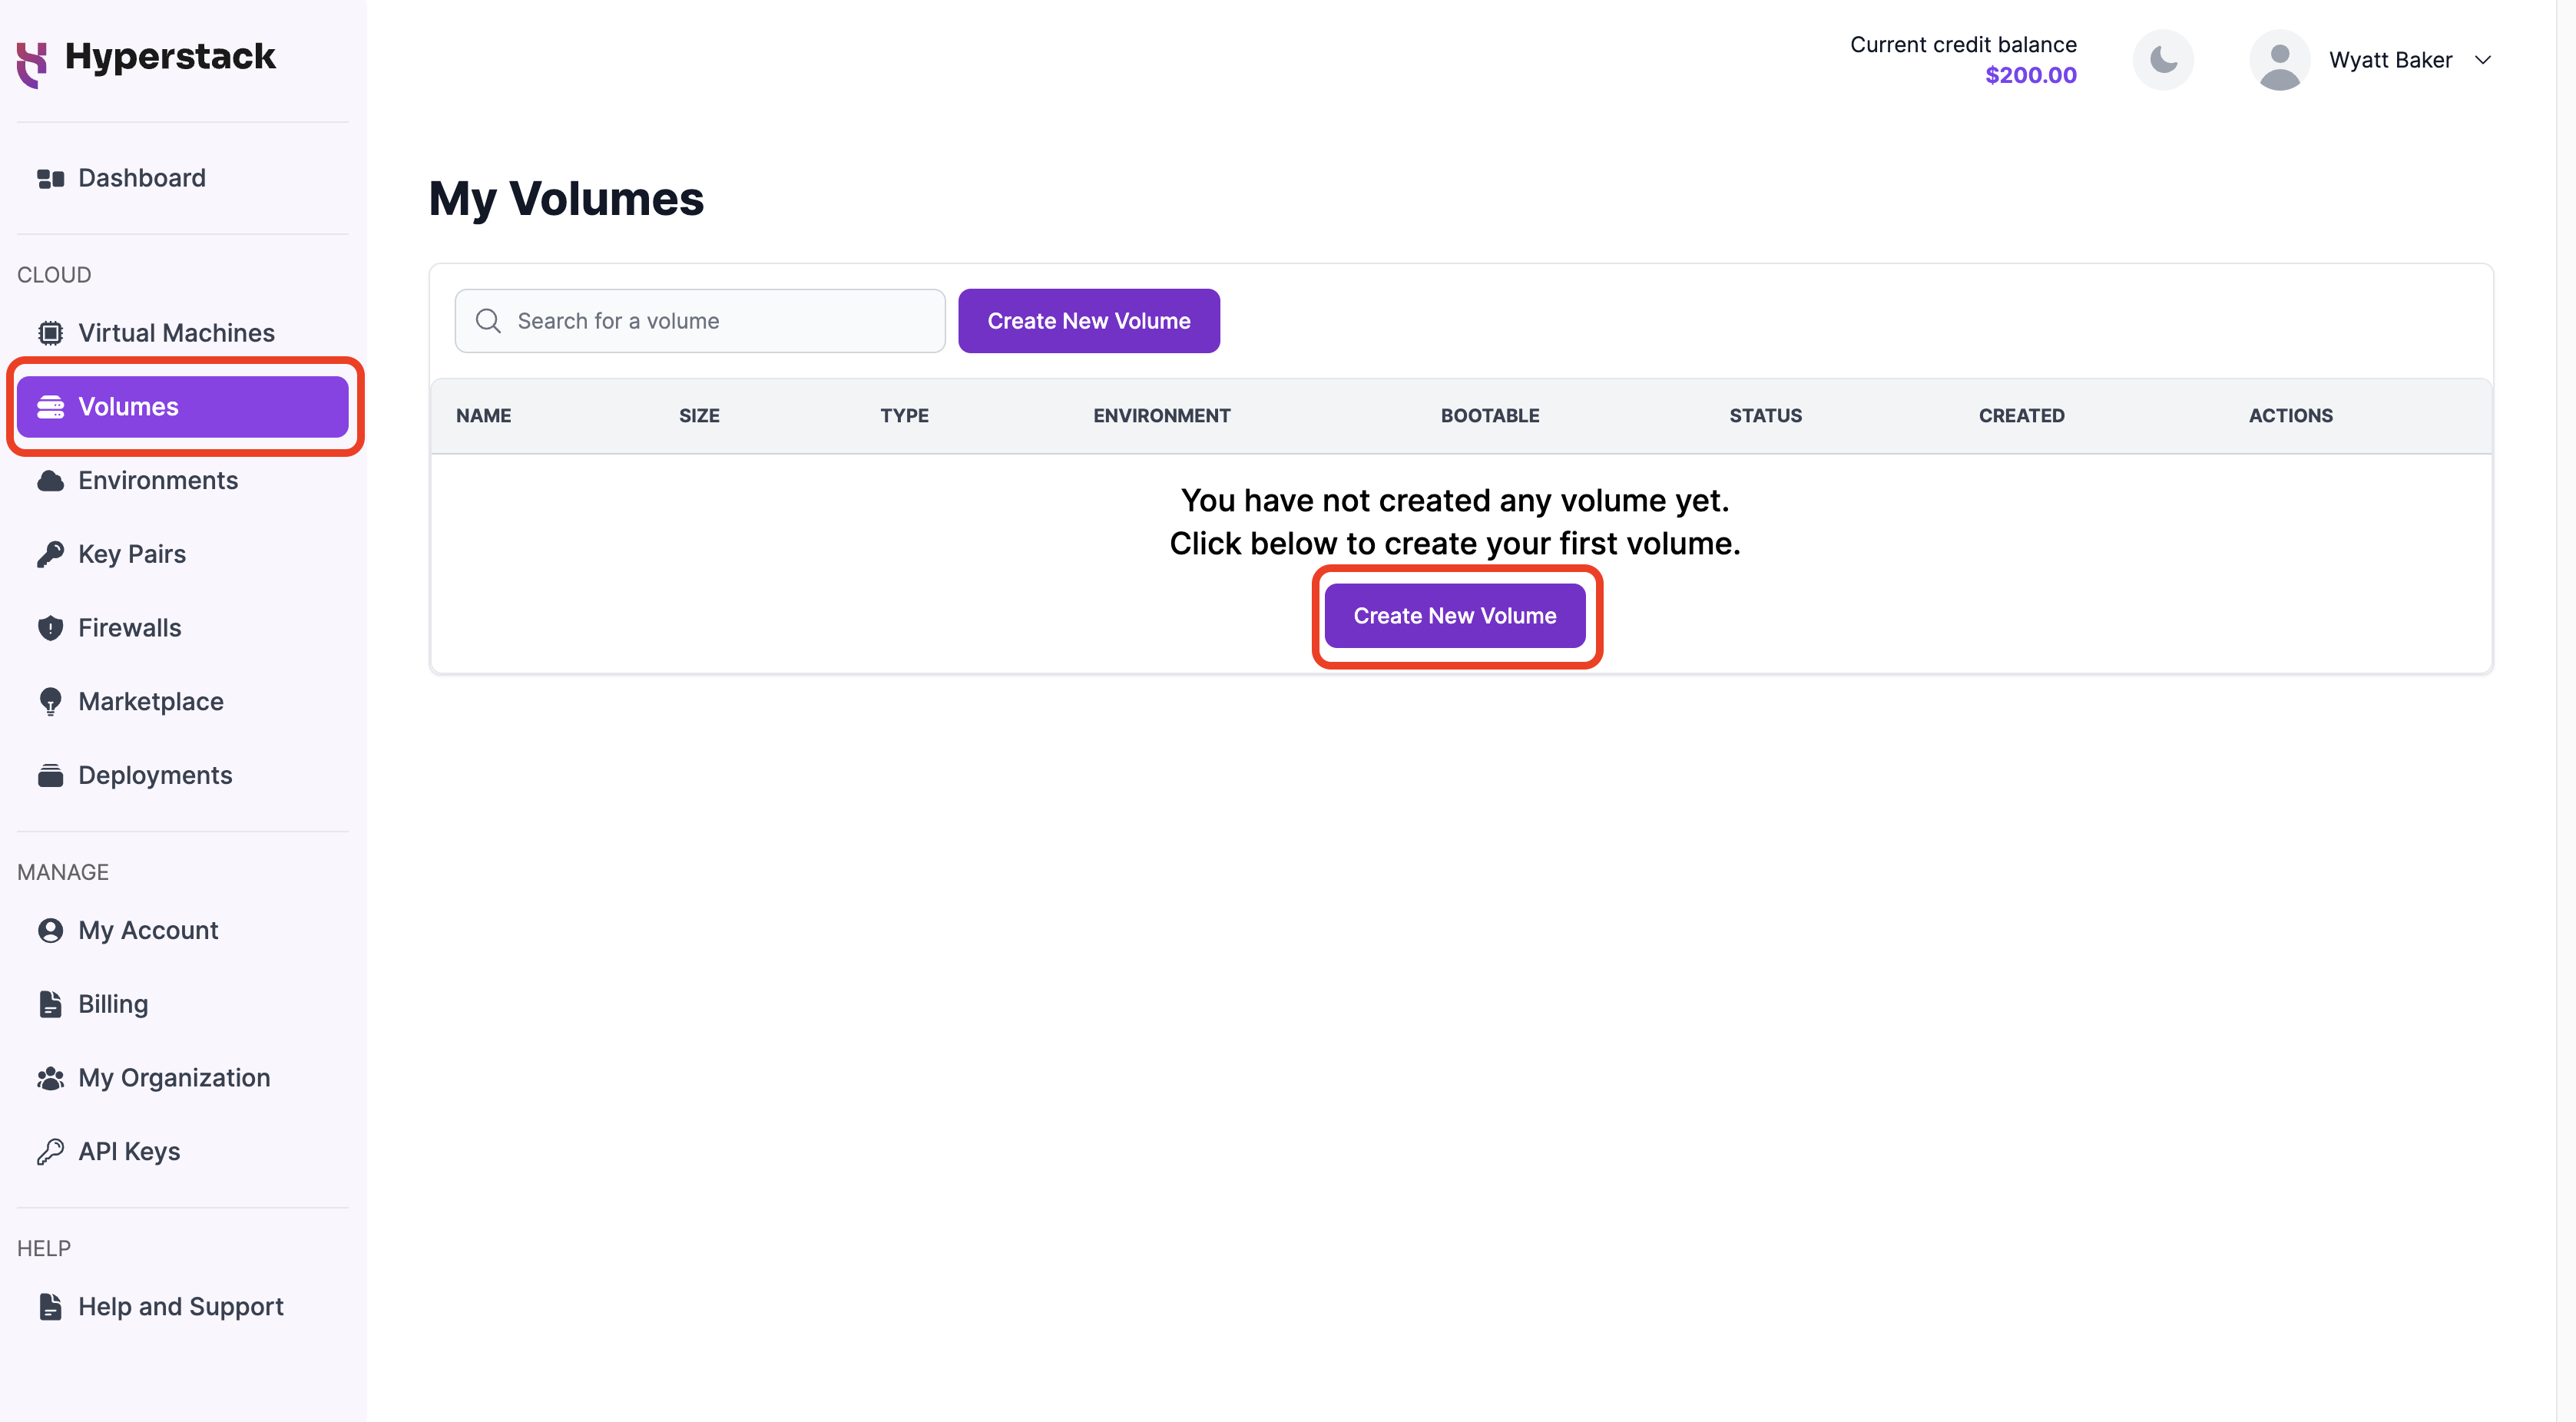
1. Access the volume dashboard
Log in to your Hyperstack account and navigate to the Volumes section in the left-hand menu. This will bring you to the "My Volumes" page where you can start the process of creating a new volume.
2. Configure the volume
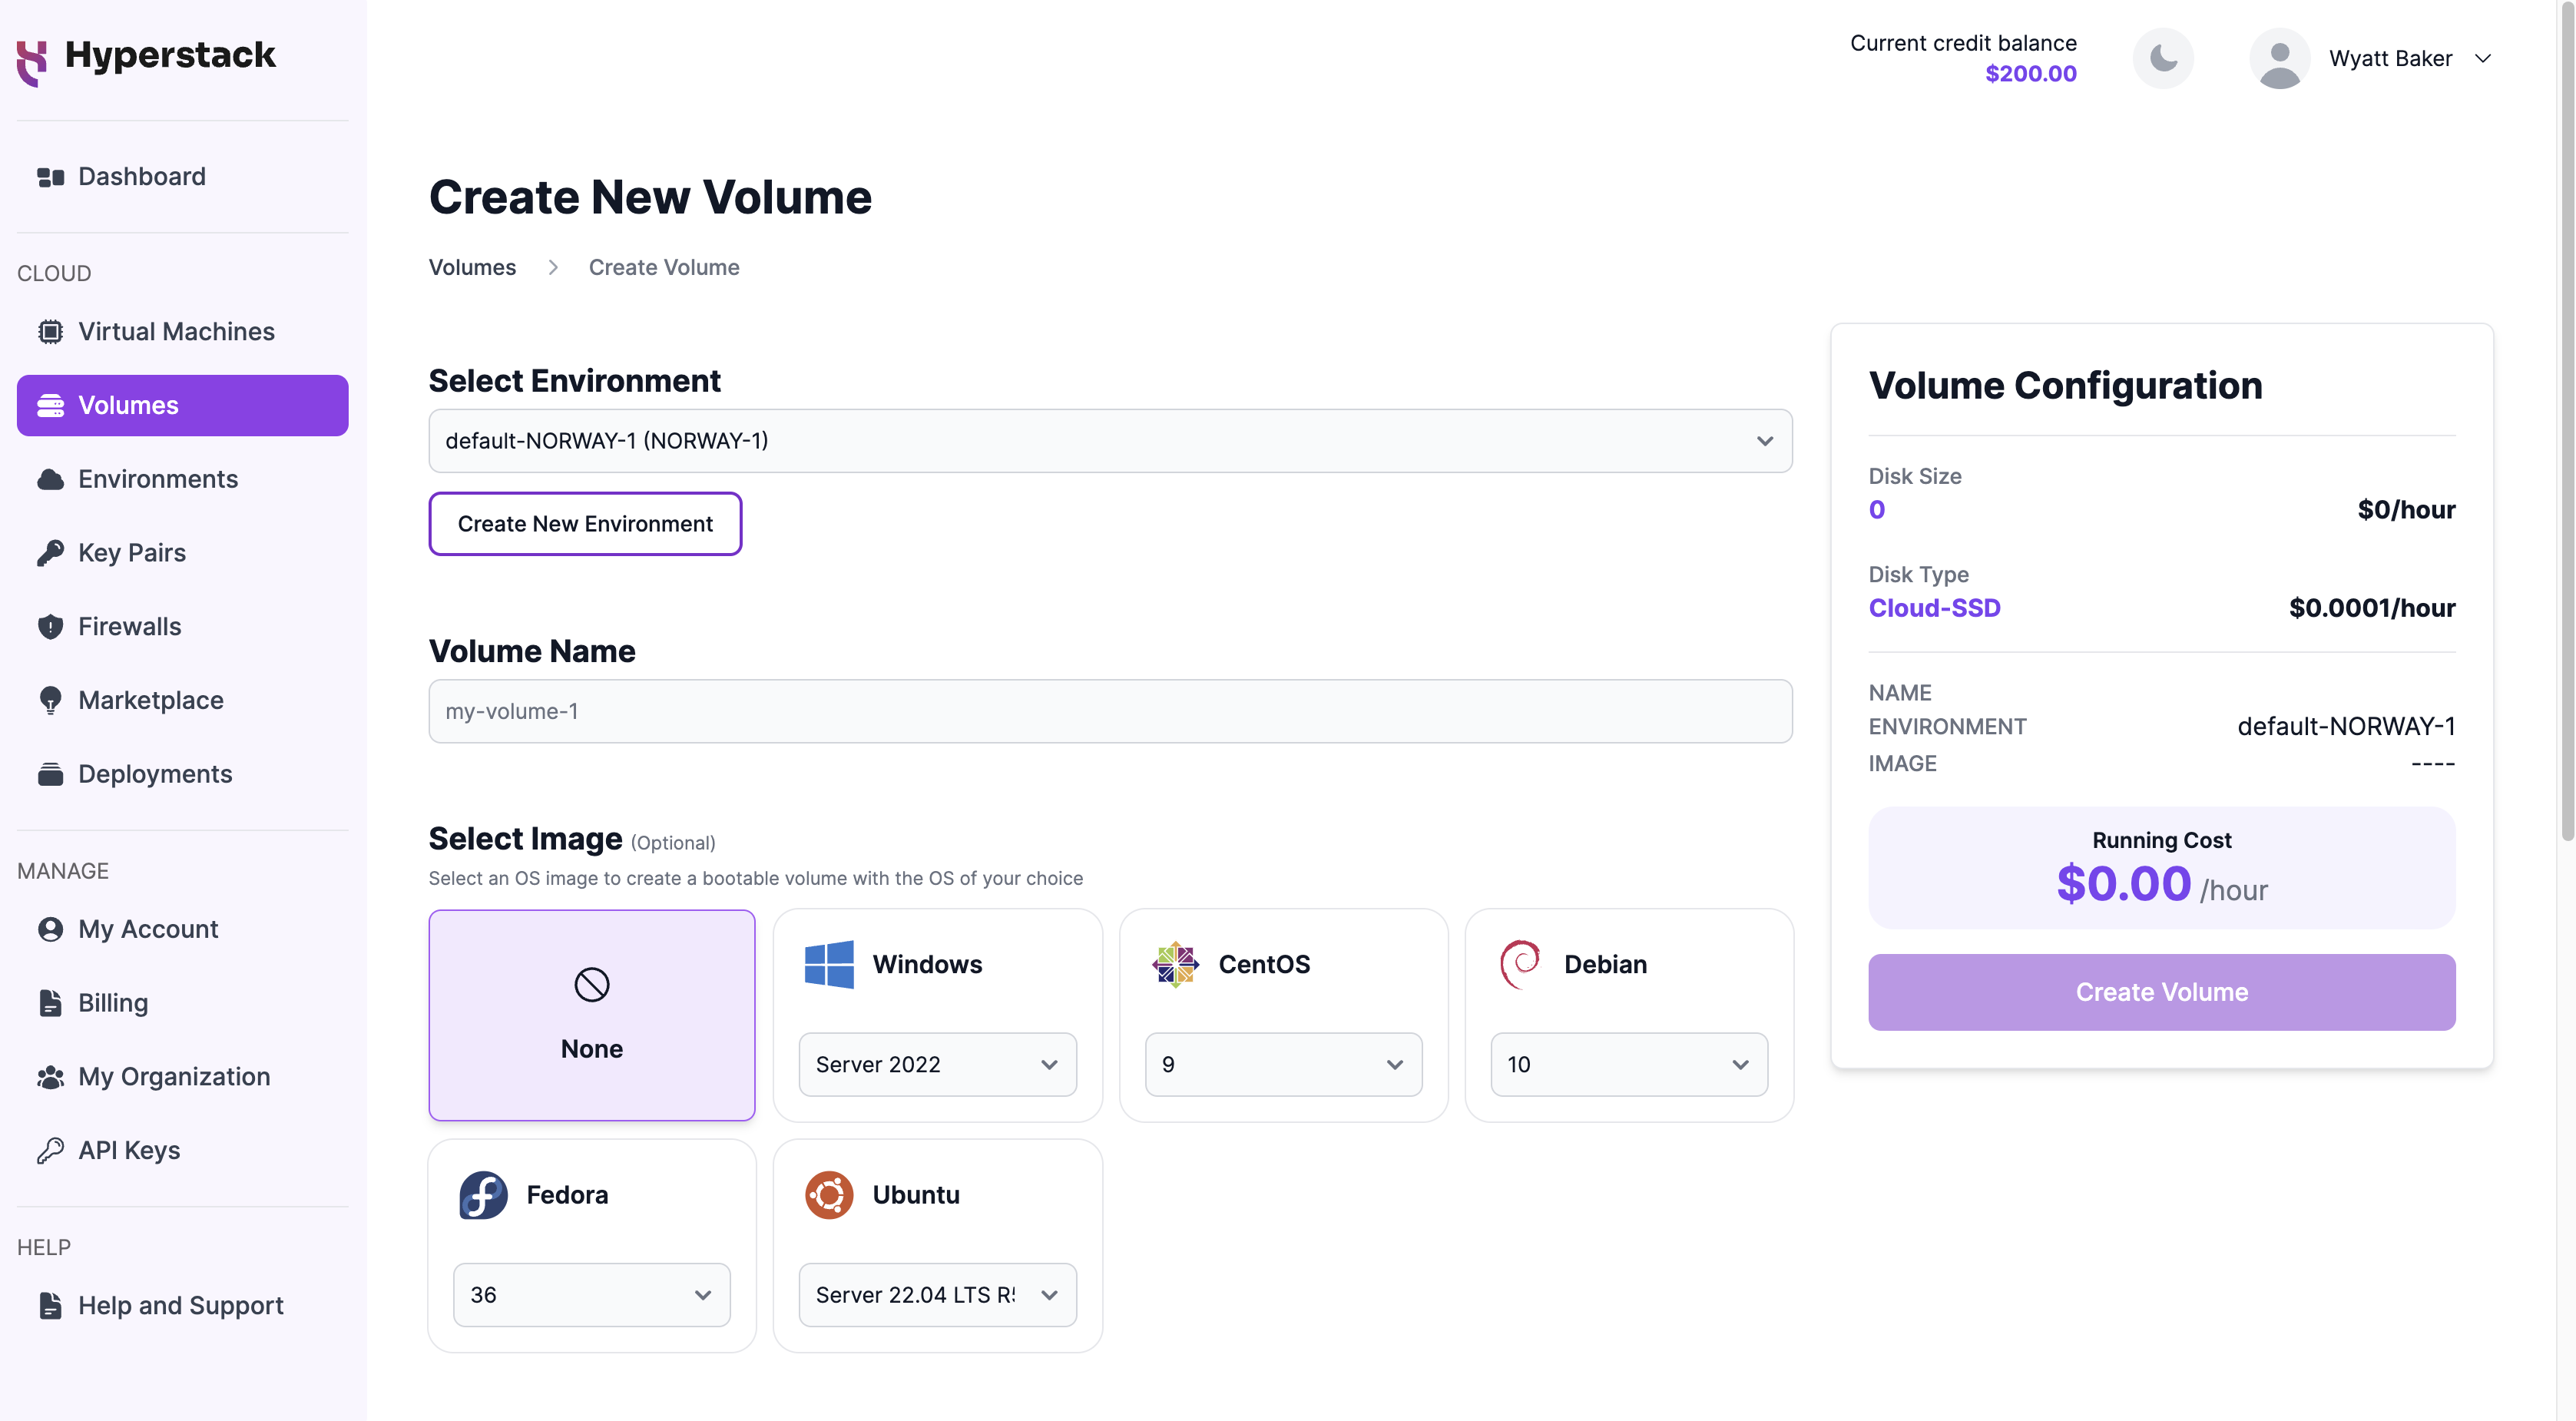
a. Select Environment: Choose an existing environment or create a new one.
b. Volume Name: Enter a name for your volume.
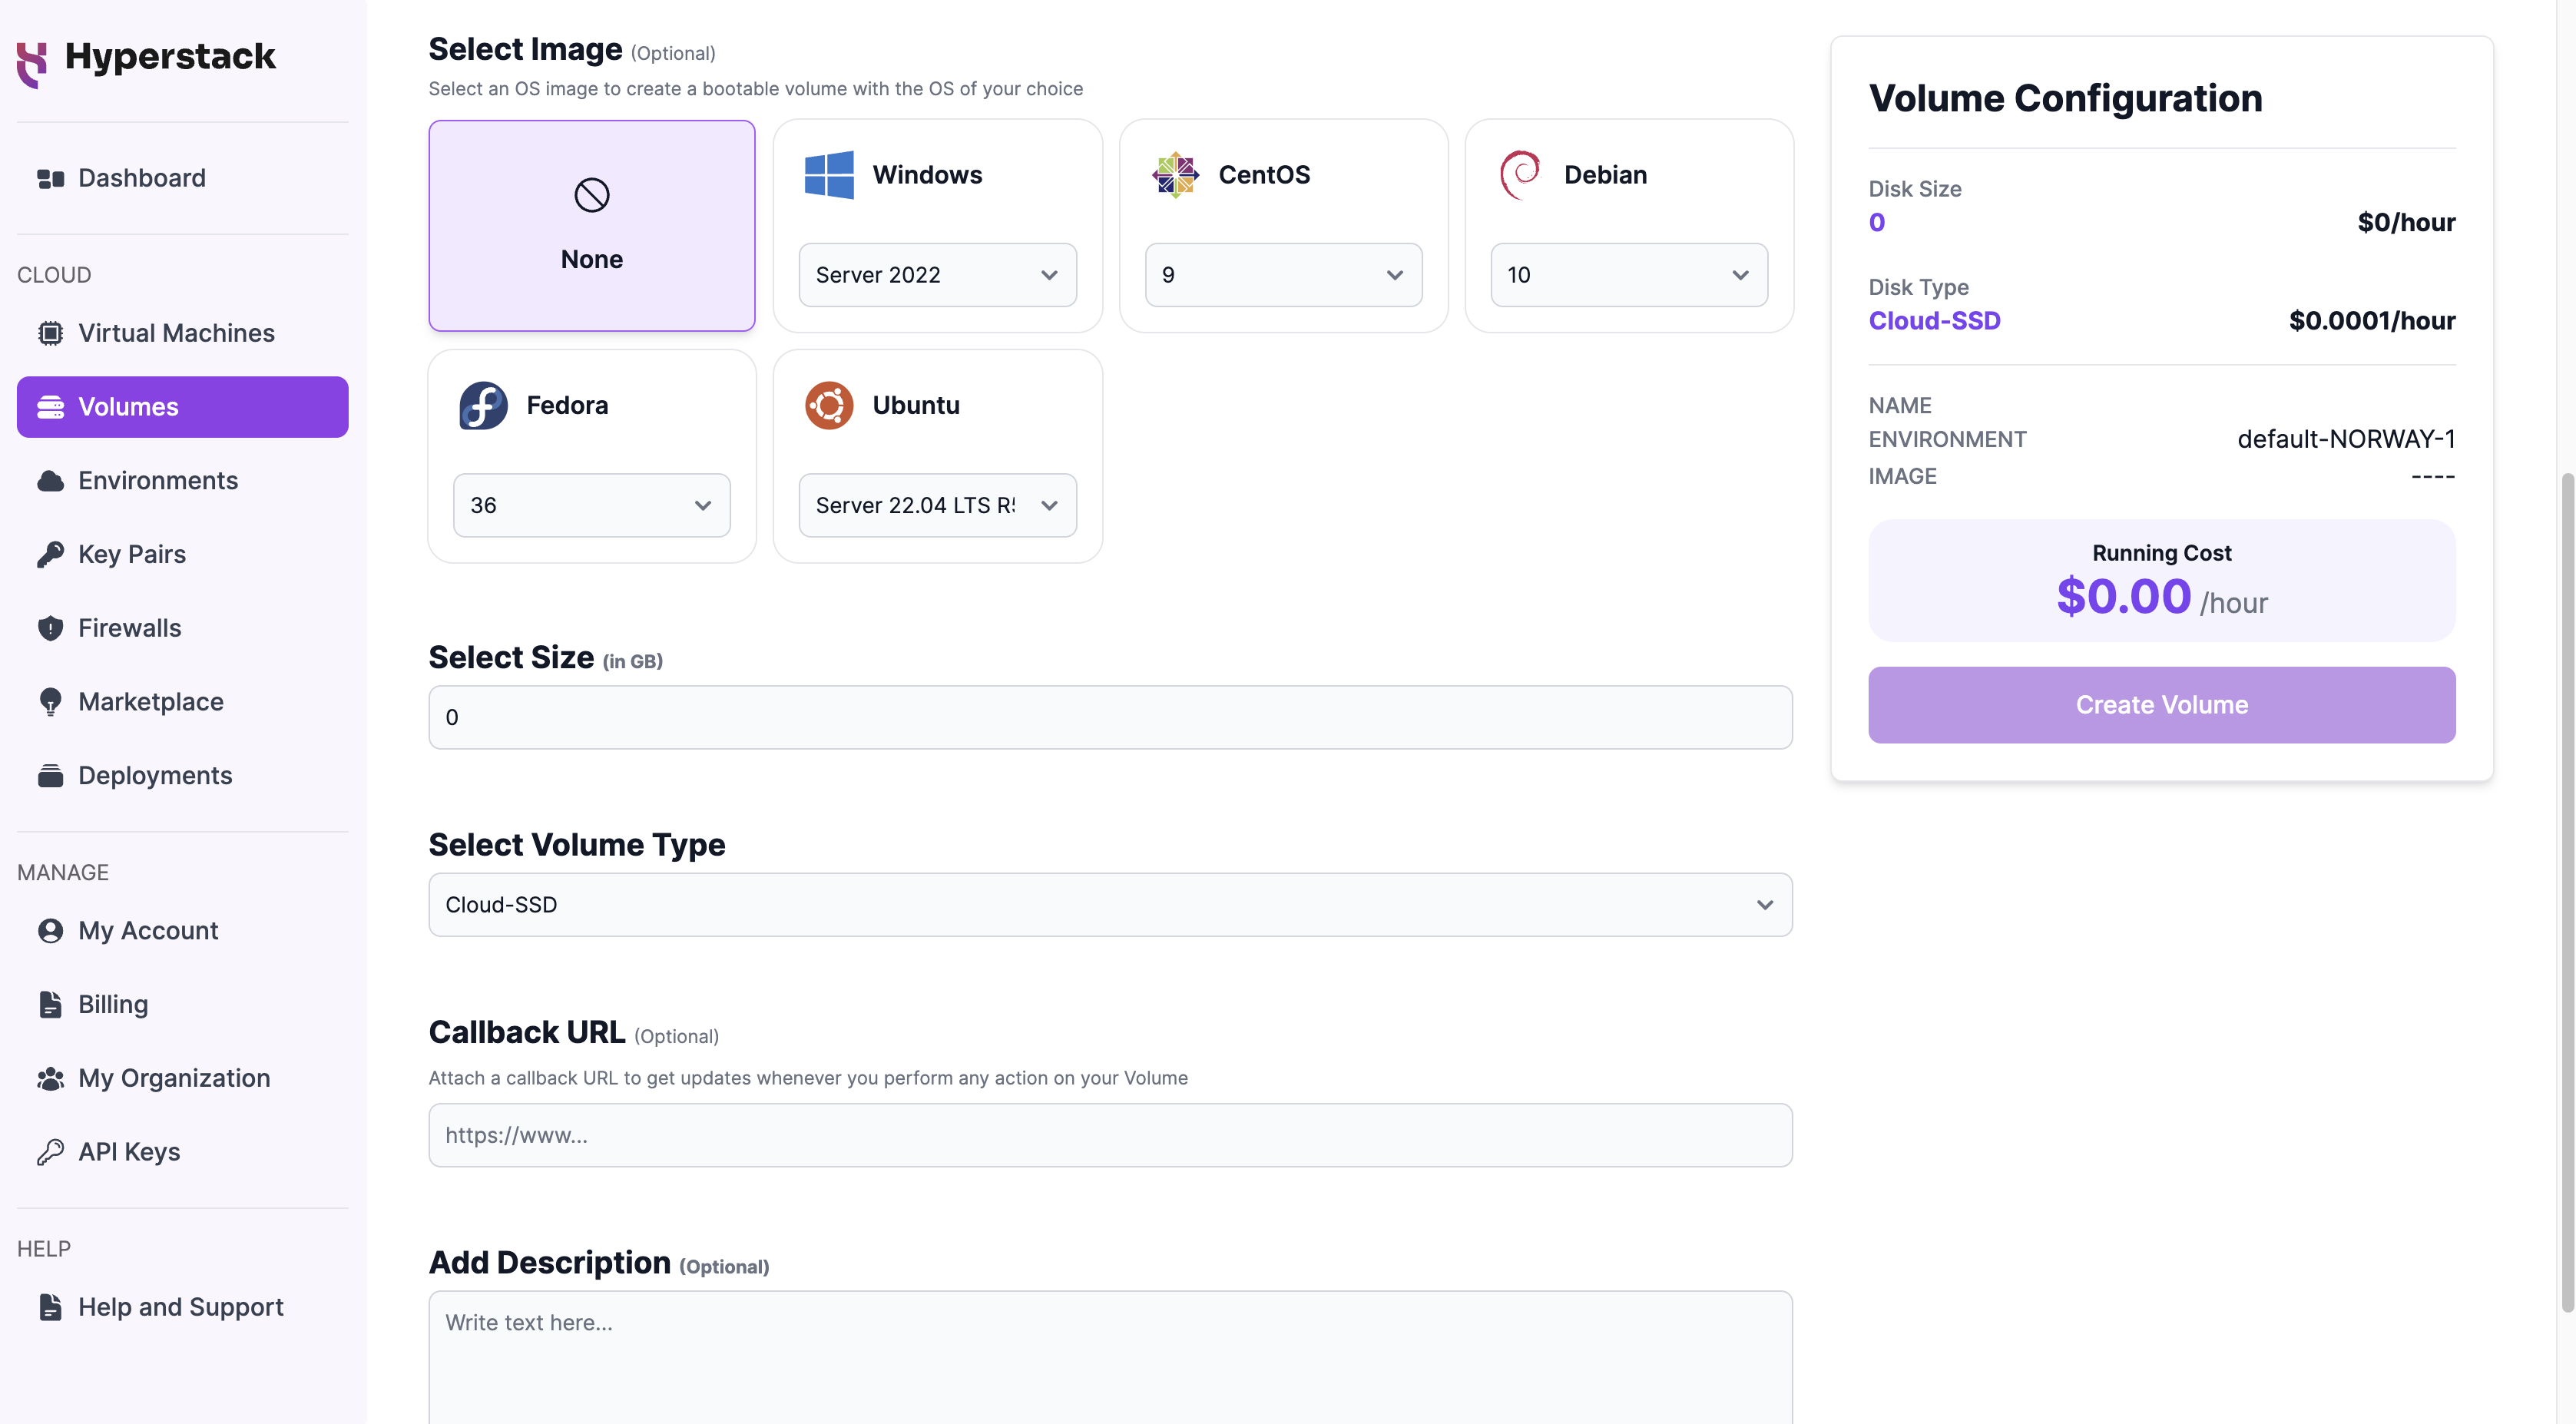
c. Operating System Image (Optional): Select an OS image like Windows, CentOS, or Ubuntu if you want to create a bootable volume.
3. Choose volume capacity and optional features
a. Disk Size: Specify the size based on your requirements, e.g., '100 GB'.
b. Callback URL (Optional): Provide a URL to receive updates on your volume.
c. Add Description (Optional): Include a brief description of your volume.
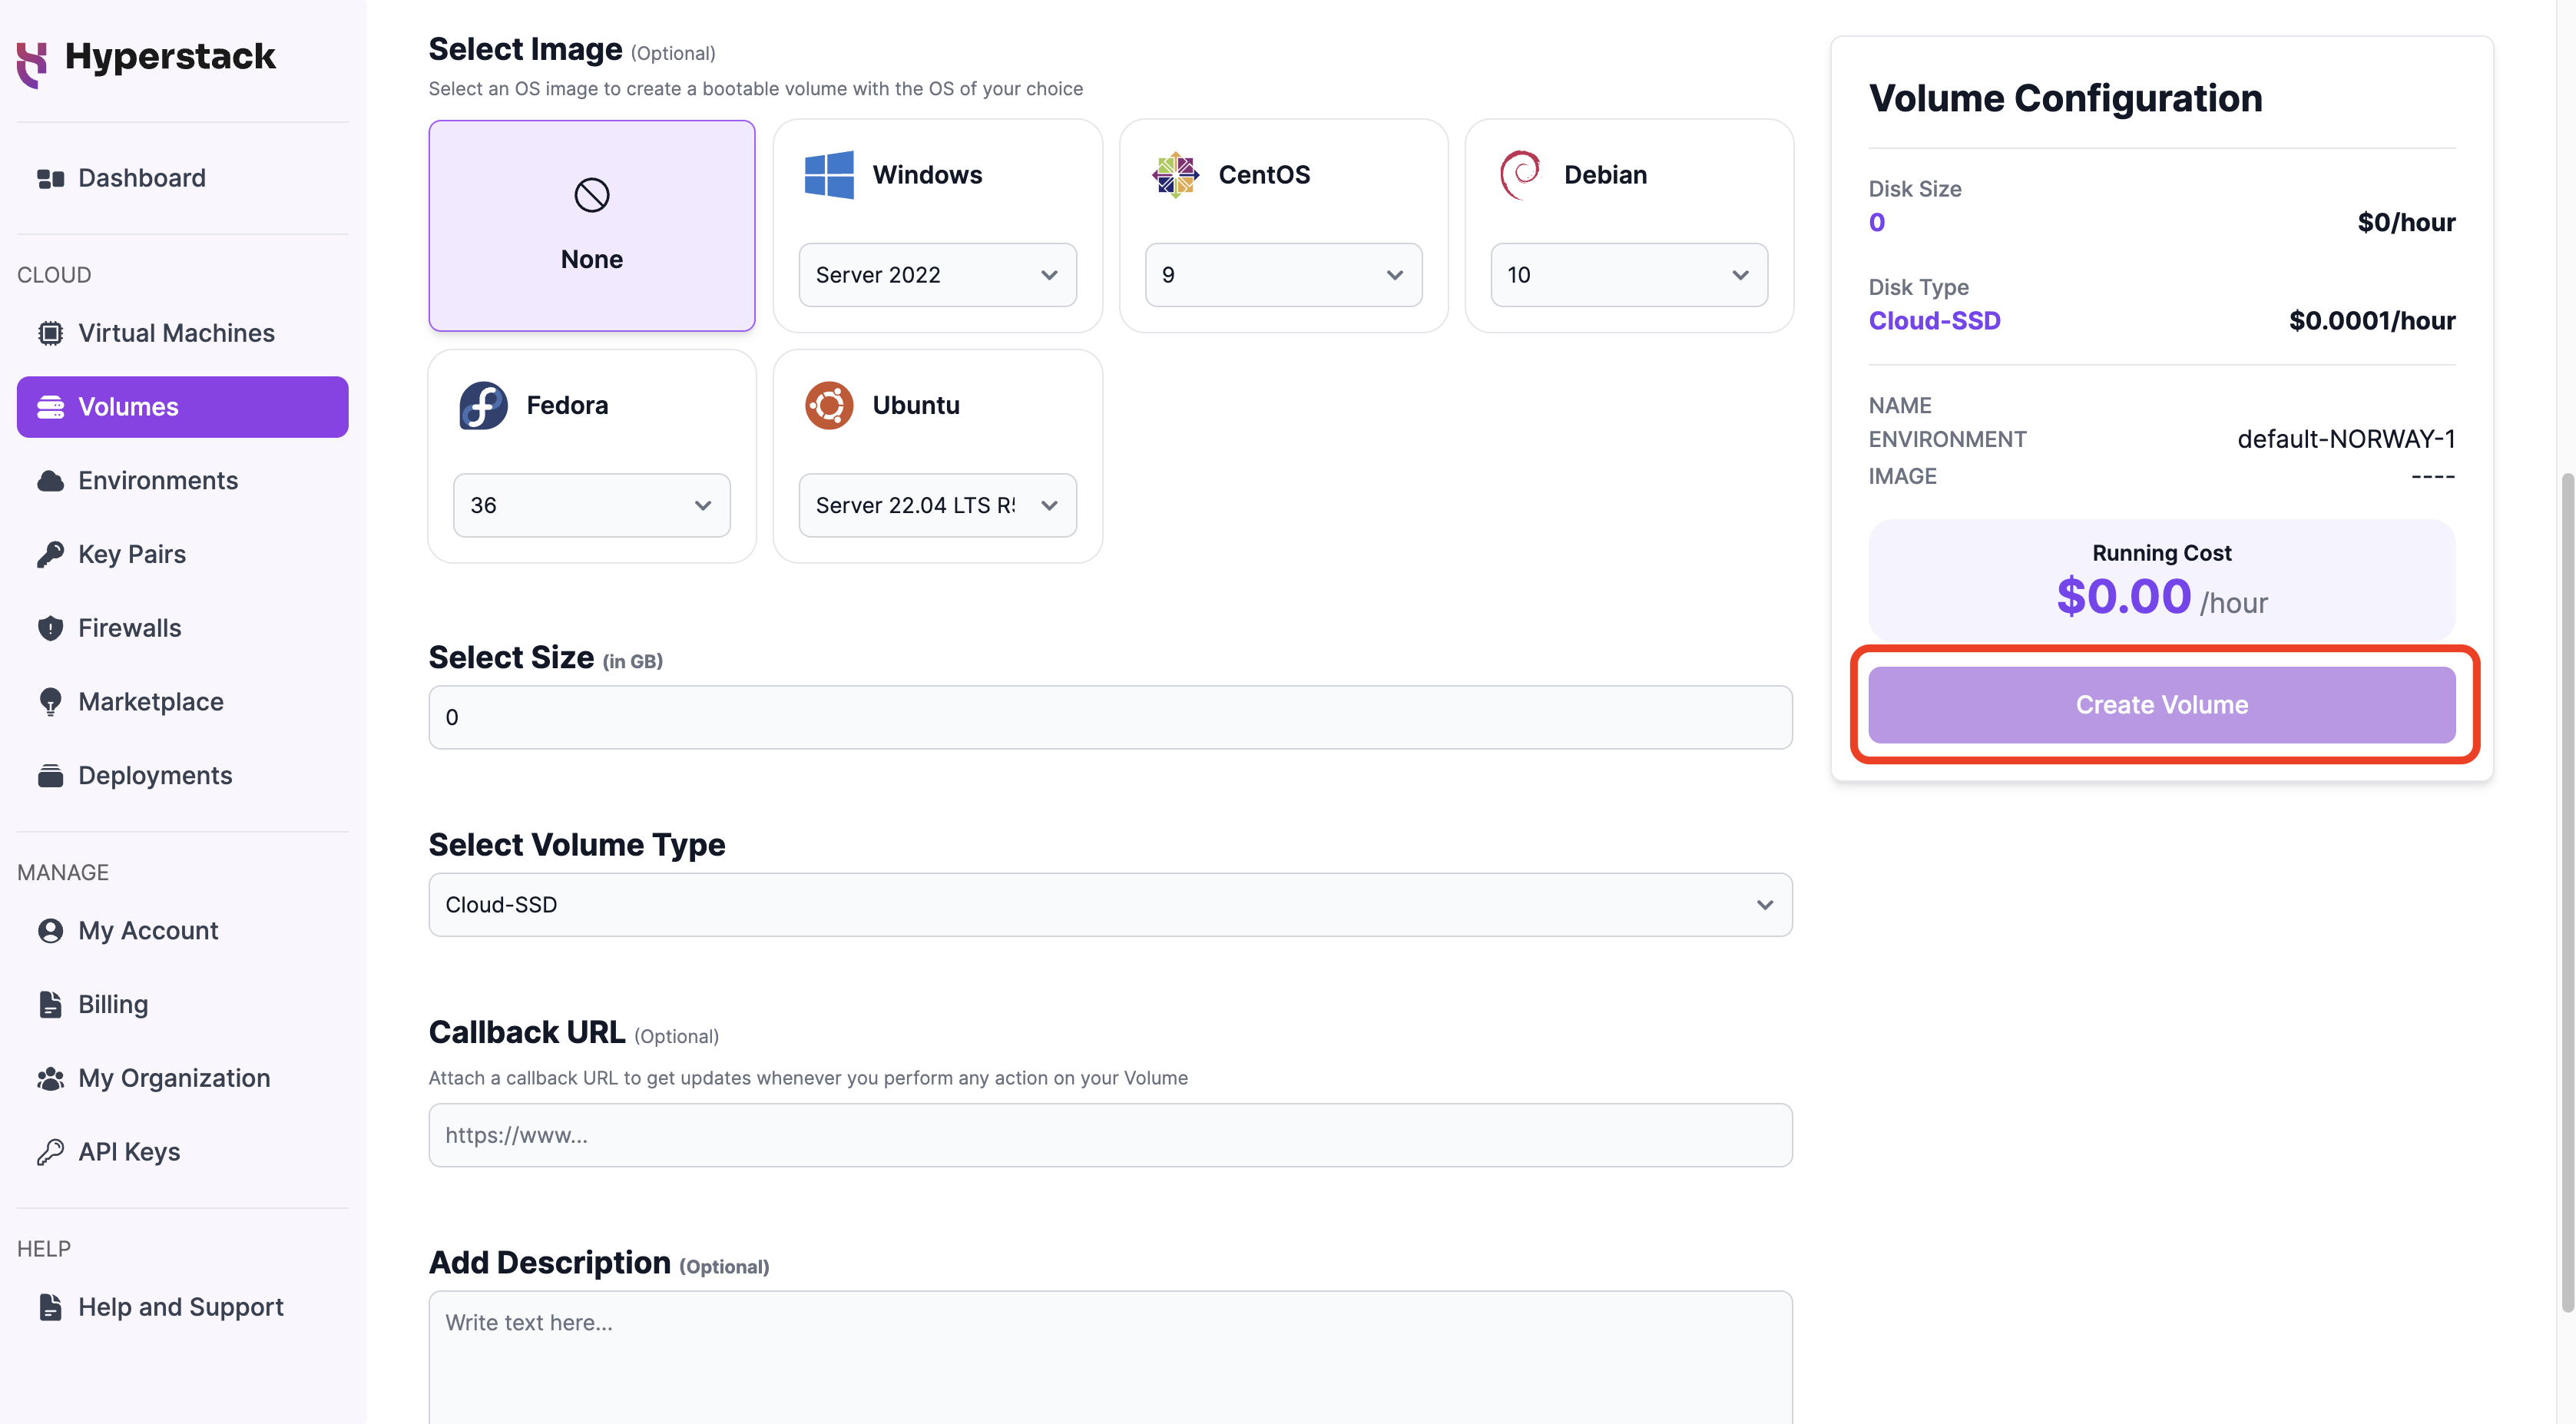
4. Review and create
Review your selections and the hourly running cost. Finally, click the 'Create Volume' button to deploy the volume.
Your new volume is now configured and ready for use. You can attach it to virtual machines or use it for your storage needs.