Organization
The Hyperstack organization feature is designed to efficiently manage your team members and their access to resources. When you sign up for a Hyperstack account, you automatically become the owner of an organization under your name, allowing you to invite members to join. You can manage resource access for team members using the user role system, which lets you grant specific permissions for each resource.
Additionally, please note that resource costs and billing are associated with the account of the organization. Therefore, resources created by all users within your organization will be billed to your organization's account.
In this article
- User account types
- Invite members to your organization
- User roles
- Manage email notifications
- Organization management APIs
User account types
When you create a new Hyperstack account, you automatically become the owner of your organization, granting you unrestricted permissions and the ability to invite new members. By default, new users you invite will be assigned a member account type without any resource action permissions. To learn how to grant permissions to organization members, click here.
A Hyperstack account can only belong to one organization at a time. To transfer an account to another organization or change ownership, please contact our technical support team at [email protected] for assistance.
Invite members to your organization
To invite a member to your organization, follow the steps below:
-
In Hyperstack, navigate to the 'My Organization' tab near the bottom of the left sidebar.
-
Click the Invite user to join organization button.
-
In the Invite user modal window, enter the email of the user you are inviting and click Send invite.
-
View the status of the invitation by clicking on the Pending requests tab. You can also delete invitations by hovering over the ⋮ under the Actions header and clicking Cancel invitation.
An invitation email with a signup link will be sent to the recipient. They simply need to create a Hyperstack account and log in to automatically become a member of your organization.
User roles
Hyperstack's Role-Based Access Control (RBAC) system enables you to create user roles that specify the level of access each member has. A user role consists of permissions and policies that have been added to it. Policies grant access to groups of permissions for common use cases, such as "AllPermissions," which provides full access to all resource actions within Hyperstack. Permissions grant access to individual resource actions, such as "virtual-machine-create," which allows a member to create a virtual machine.
Create a user role
Here's how to create a custom user role and manage resource access effectively:
-
In Hyperstack, navigate to the My Organization tab near the bottom of the left sidebar.
-
In the top left of the organization window, click Create a new User Role.
-
Name the user role and select the policies and permissions corresponding to the resource actions you wish to grant the user.
a. Policies: Grant access to groups of permissions for common use cases, such as "AllPermissions," which grants full access to all resource actions within Hyperstack.
b. Permissions: Grant access to individual resource actions, such as "virtual-machine-create", which grants a member the permission to create a virtual machine.
-
After selecting the desired policies and permissions, click Create Role.
-
To view your new user role, navigate back to the My Organization page and click View User Roles in the top left corner.
-
From this page, you can edit or delete existing user roles.
The user role demonstrated in the video above grants a user access to all resource actions within Hyperstack.
Assign user role to organization member
-
Navigate to the My Organization page located near the bottom of the left sidebar.
-
Under the Roles header, click the "⋮" next to the member you want to assign the role to. Select the desired role and click the Assign role button.
Manage email notifications
Organization owners can manage email notifications that alert them when their account balance reaches a specified threshold to ensure resources remain active. Notifications are automatically sent when the remaining credit, calculated against current resource usage, corresponds to approximately 48, 24, 12, and 6 hours of usage left.
To access credit limit email notification settings:
-
Navigate to the Account Details page by selecting My Account from the left sidebar, then choose Settings.
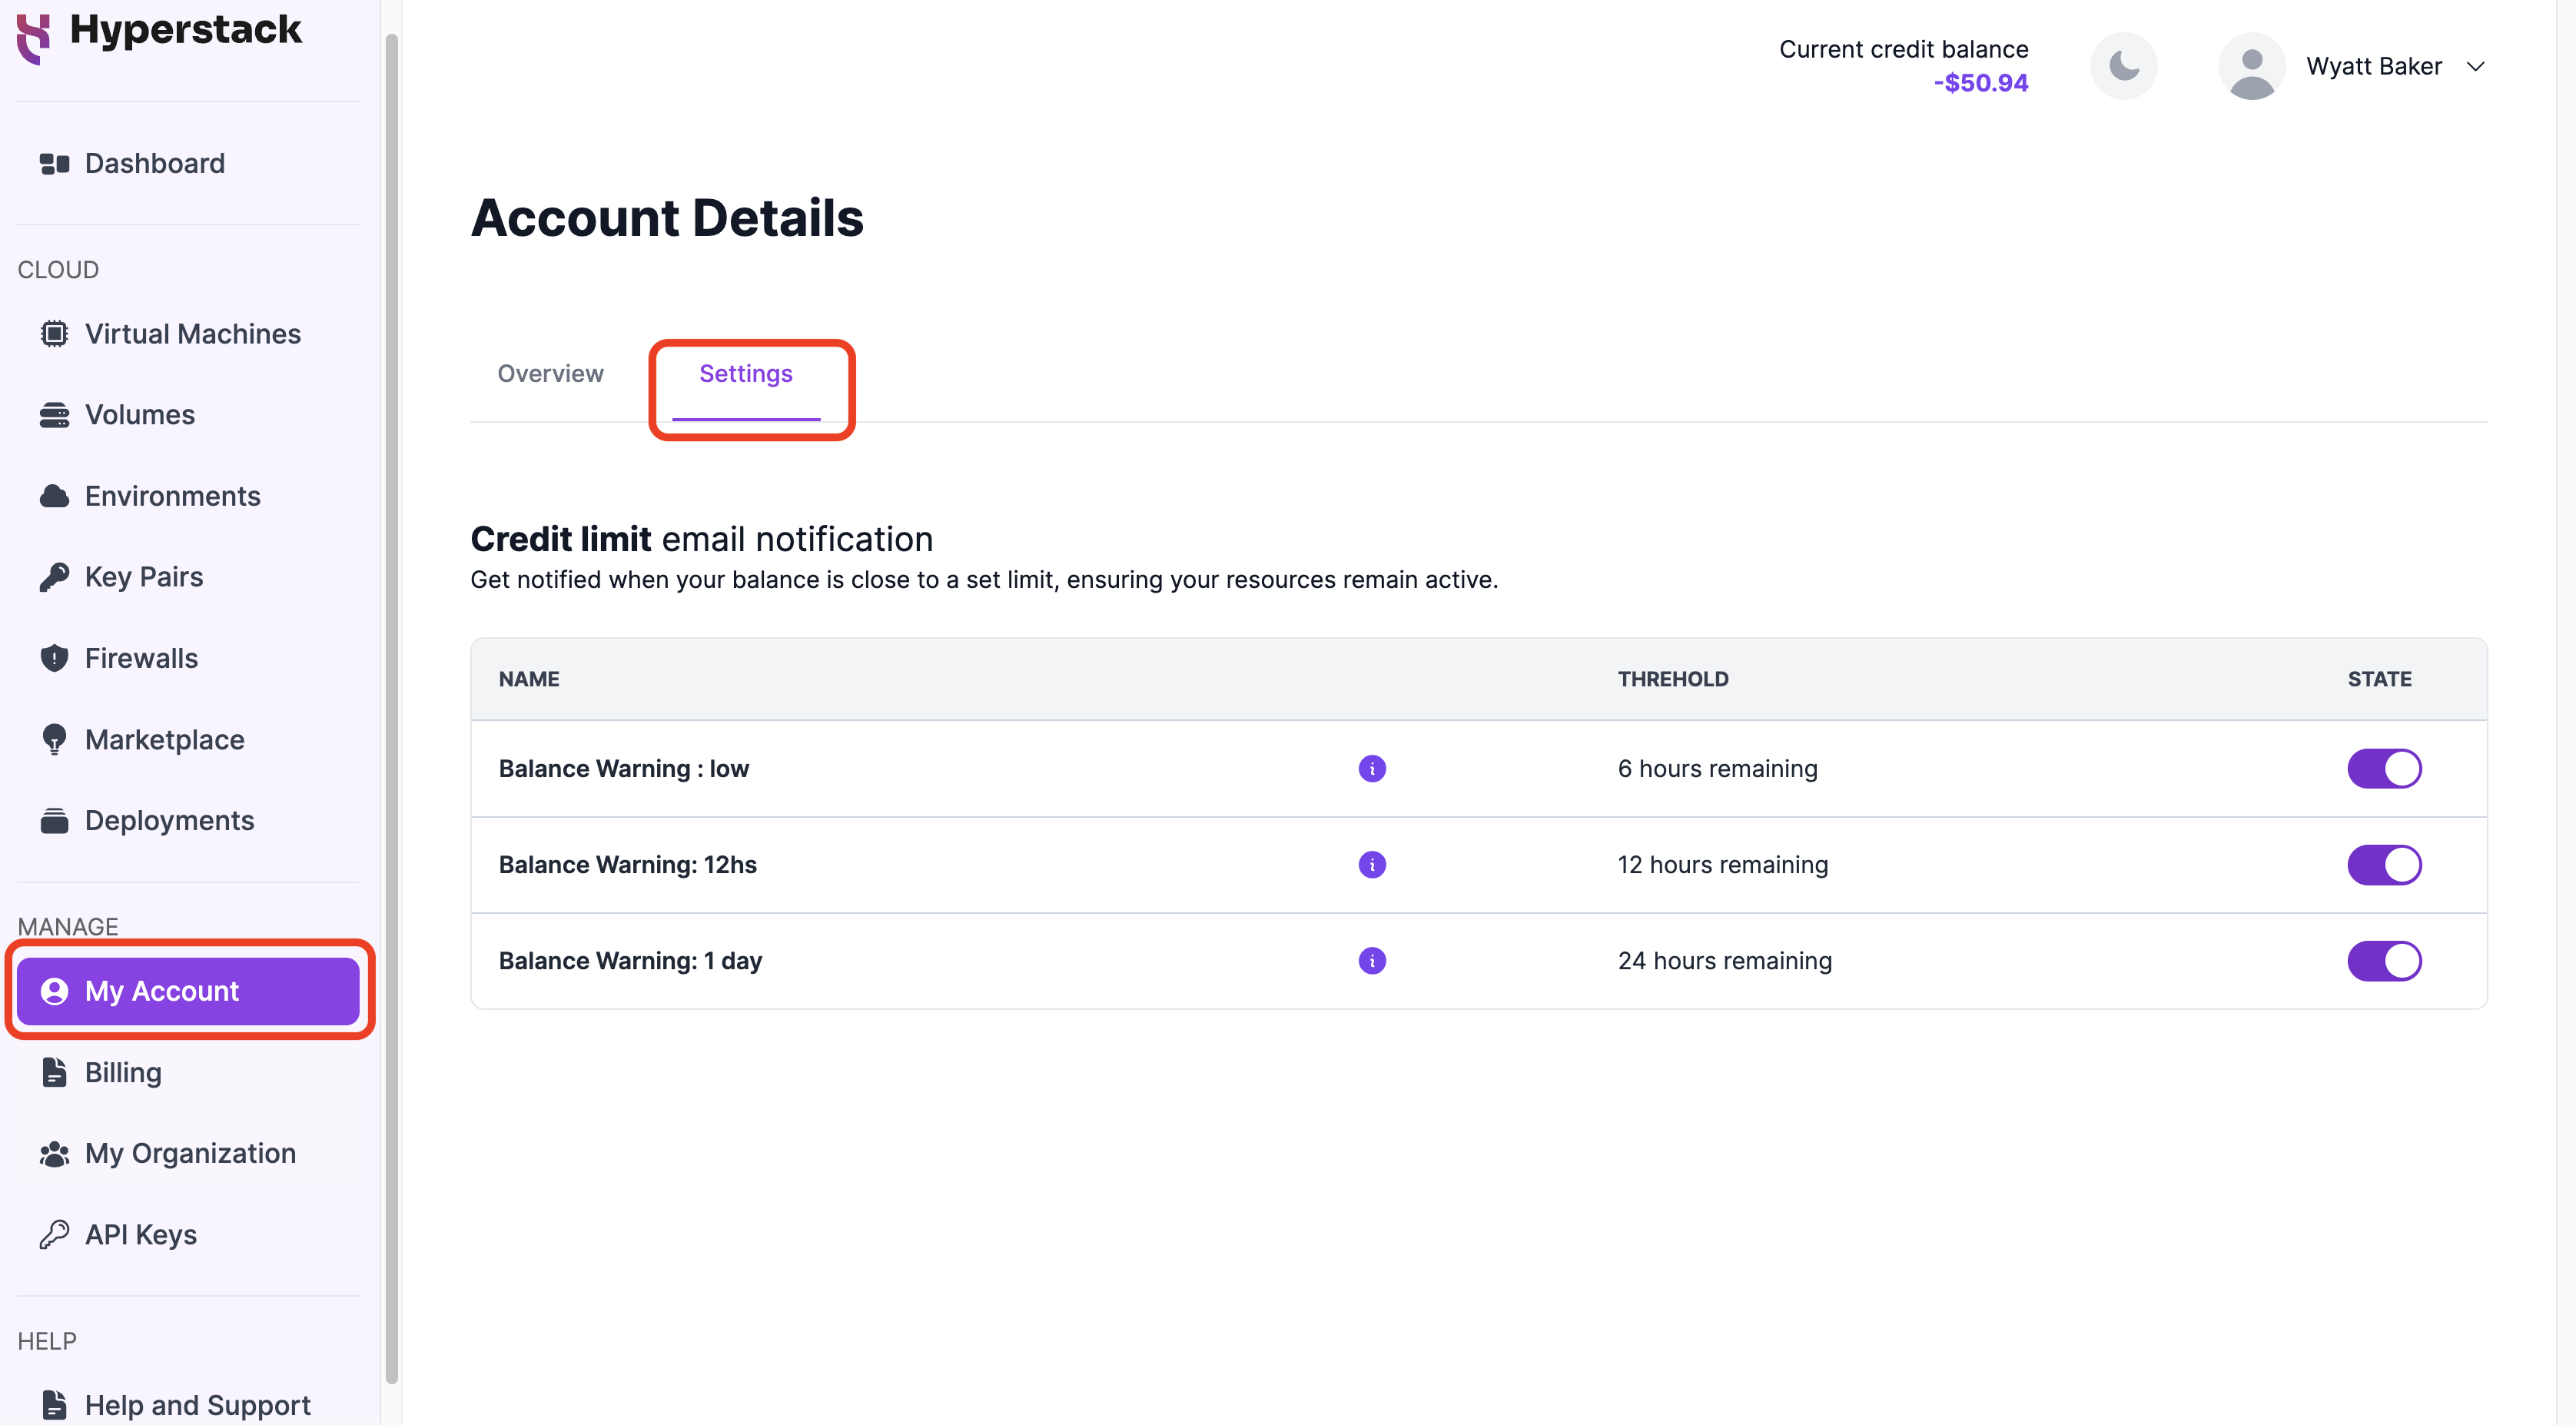
-
Use the STATE toggle to enable or disable the email notifications as needed.

Once disabled, credit balance warning notifications will no longer be sent to your email. You can re-enable these notifications at any time by toggling the STATE switch again.
Organization management APIs
See below for a list of APIs that provide control over your organization, including member invitations and user access permissions.
Core APIs
APIs to obtain and change details about your organization.
| Endpoint Name | URL | Description |
|---|---|---|
| Retrieve organization details | GET /auth/organizations | Retrieves details about your organization and its members. |
| Remove organization member | POST /auth/organizations/remove-member | Removes a member from your organization. |
| Change organization name | PUT /auth/organizations/update | Changes the name of your organization. |
Member invitation APIs
APIs for managing organization member invitations.
| Endpoint Name | URL | Description |
|---|---|---|
| Invite organization member | POST /auth/invites | Invites a member to your organization. |
| List organization invitations | GET /auth/invites | Retrieves a list of organization invitations. |
| Delete organization invitations | DELETE /auth/invites/{id} | Deletes an organization invitation. |
User role APIs
APIs for managing user roles, enabling the assignment of pre-configured sets of resource access permissions and policies to users within your organization.
| Endpoint Name | URL | Description |
|---|---|---|
| List RBAC roles | GET /auth/roles | Returns a list of existing RBAC roles. |
| Create RBAC role | POST /auth/roles | Creates an RBAC role. |
| Retrieve RBAC role details | GET /auth/roles/{id} | Retrieves the details of an existing RBAC role. |
| Update RBAC role | PUT /auth/roles/{id} | Modifies an RBAC role. |
| Delete RBAC role | DELETE /auth/roles/{id} | Deletes an RBAC role. |
| Assign RBAC role to organization member | PUT /auth/users/{user_id}/assign-roles | Assigns an RBAC role to a member of your organization, granting them the specified permissions and policies. |
| Revoke RBAC role from organization member | DELETE /auth/users/{user_id}/roles | Removes an RBAC role from a member of your organization, revoking the specified permissions and policies. |
Permissions and policies APIs
APIs for obtaining permissions/policies information.
| Endpoint Name | URL | Description |
|---|---|---|
| List permissions | GET /auth/permissions | Lists permissions that can be added to user roles. |
| List Policies | GET /auth/policies | Returns a list of policies that can be added to user roles. |
| List my permissions | GET /auth/users/me/permissions | Retrieves a list of permissions assigned to your account. |
| List user permissions | GET /auth/users/{id}/permissions | Retrieves a list of permissions assinged to a user. |
Manage user role APIs
APIs for managing the user roles assigned to members within your organization, enabling you to control resource access for your users.
| Endpoint Name | URL | Description |
|---|---|---|
| Assign RBAC role to organization member | PUT /auth/users/{user_id}/assign-roles | Assigns an RBAC role to a member of your organization, granting them the specified permissions and policies. |
| Revoke RBAC role from organization member | DELETE /auth/users/{user_id}/roles | Removes an RBAC role from a member of your organization, revoking the specified permissions and policies. |